

Nest Hello Doorbell wiring with DETA C3500 / C3501 Chime UK
May 7, 2019 | How To | 41 Comments

Just writing up this post because I struggled to find good information on how to wire up the Nest Hello Doorbell with a common UK chime box the DETA C3500. Please note I’m not an electrician, just a normal guy that is pretty decent at some basic DIY. Make sure you seek advice of your own if you don’t know what you are doing.
There were some instructions online that showed how to wire up the Nest with different chimes and some instructions bypassing the chime box completely. I wanted to see if I could try and keep my existing chime box without having to fork out for a new one.
You obviously have your existing door chime box and the Nest Hello but additionally, items I used for my installation:
- Some 1mm cable
- Some 2-way cable connectors
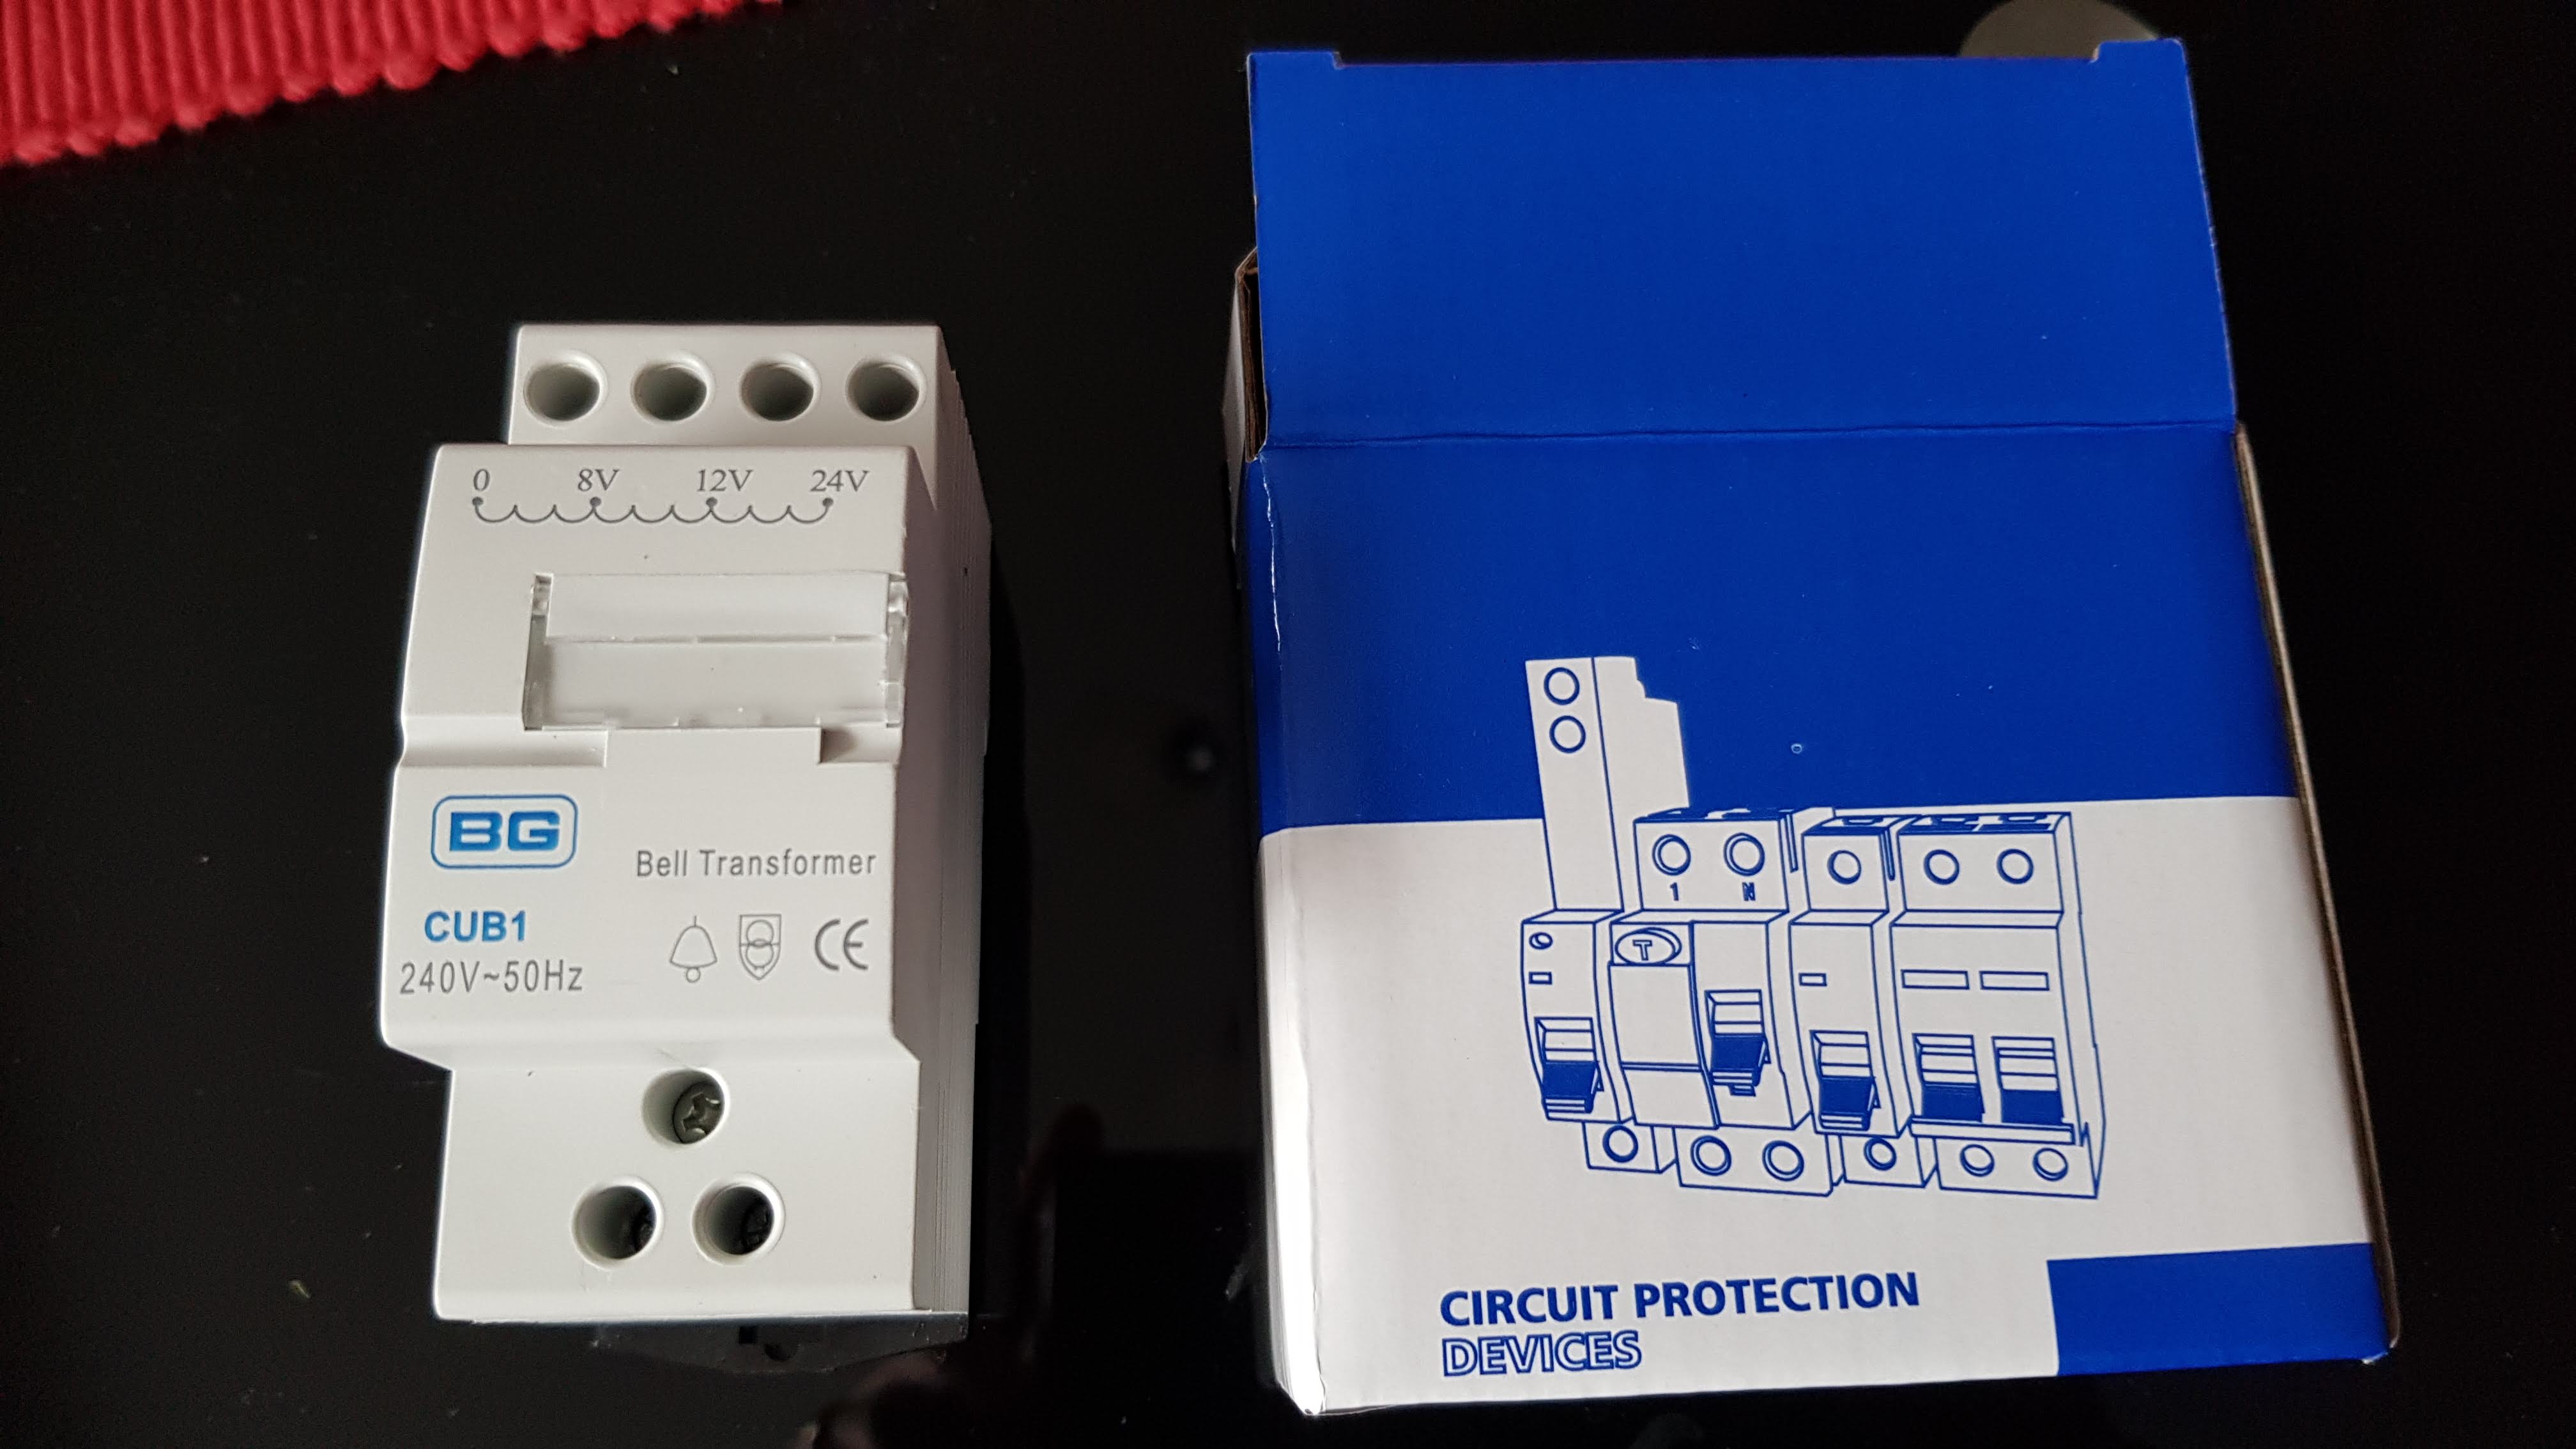
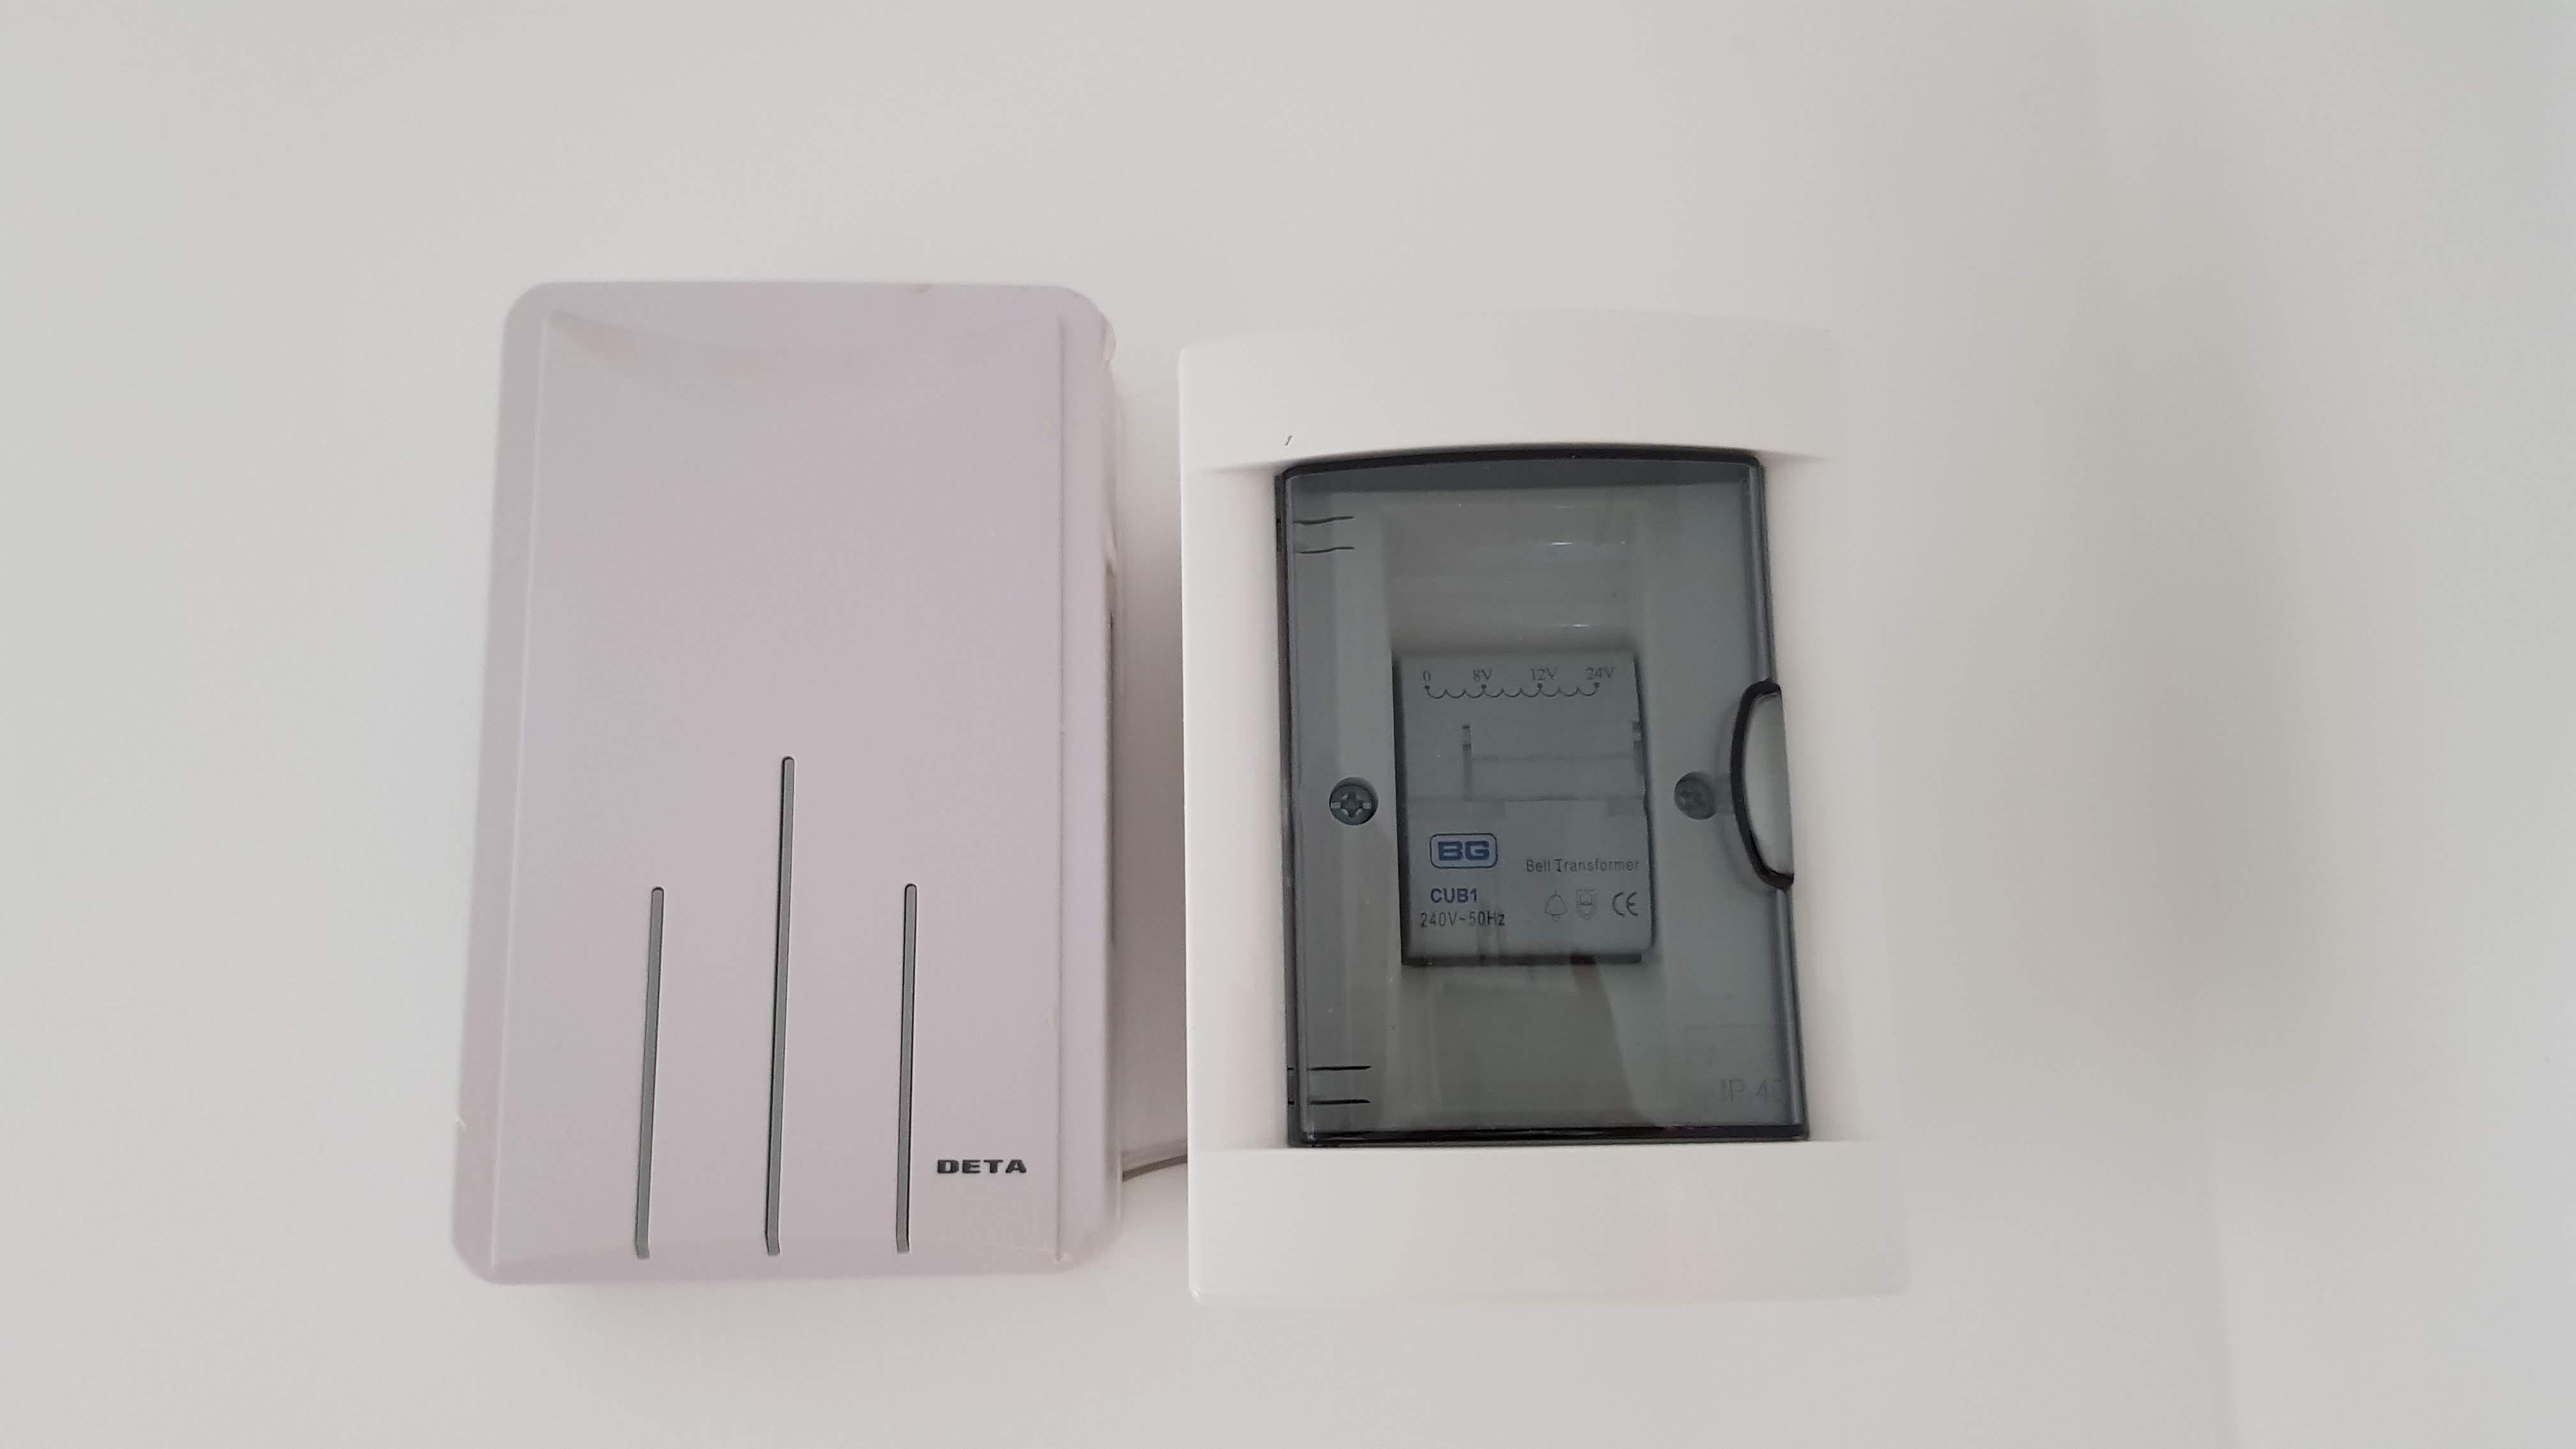
- British General 8-24V 8VA Bell Transformer Module (Screwfix or Amazon links)
- Surface Mounted Fuse Box
The transformer you require must be able to supply at a minimum of 12v to be able to power the camera. I got mines from Screwfix, link to it is above.
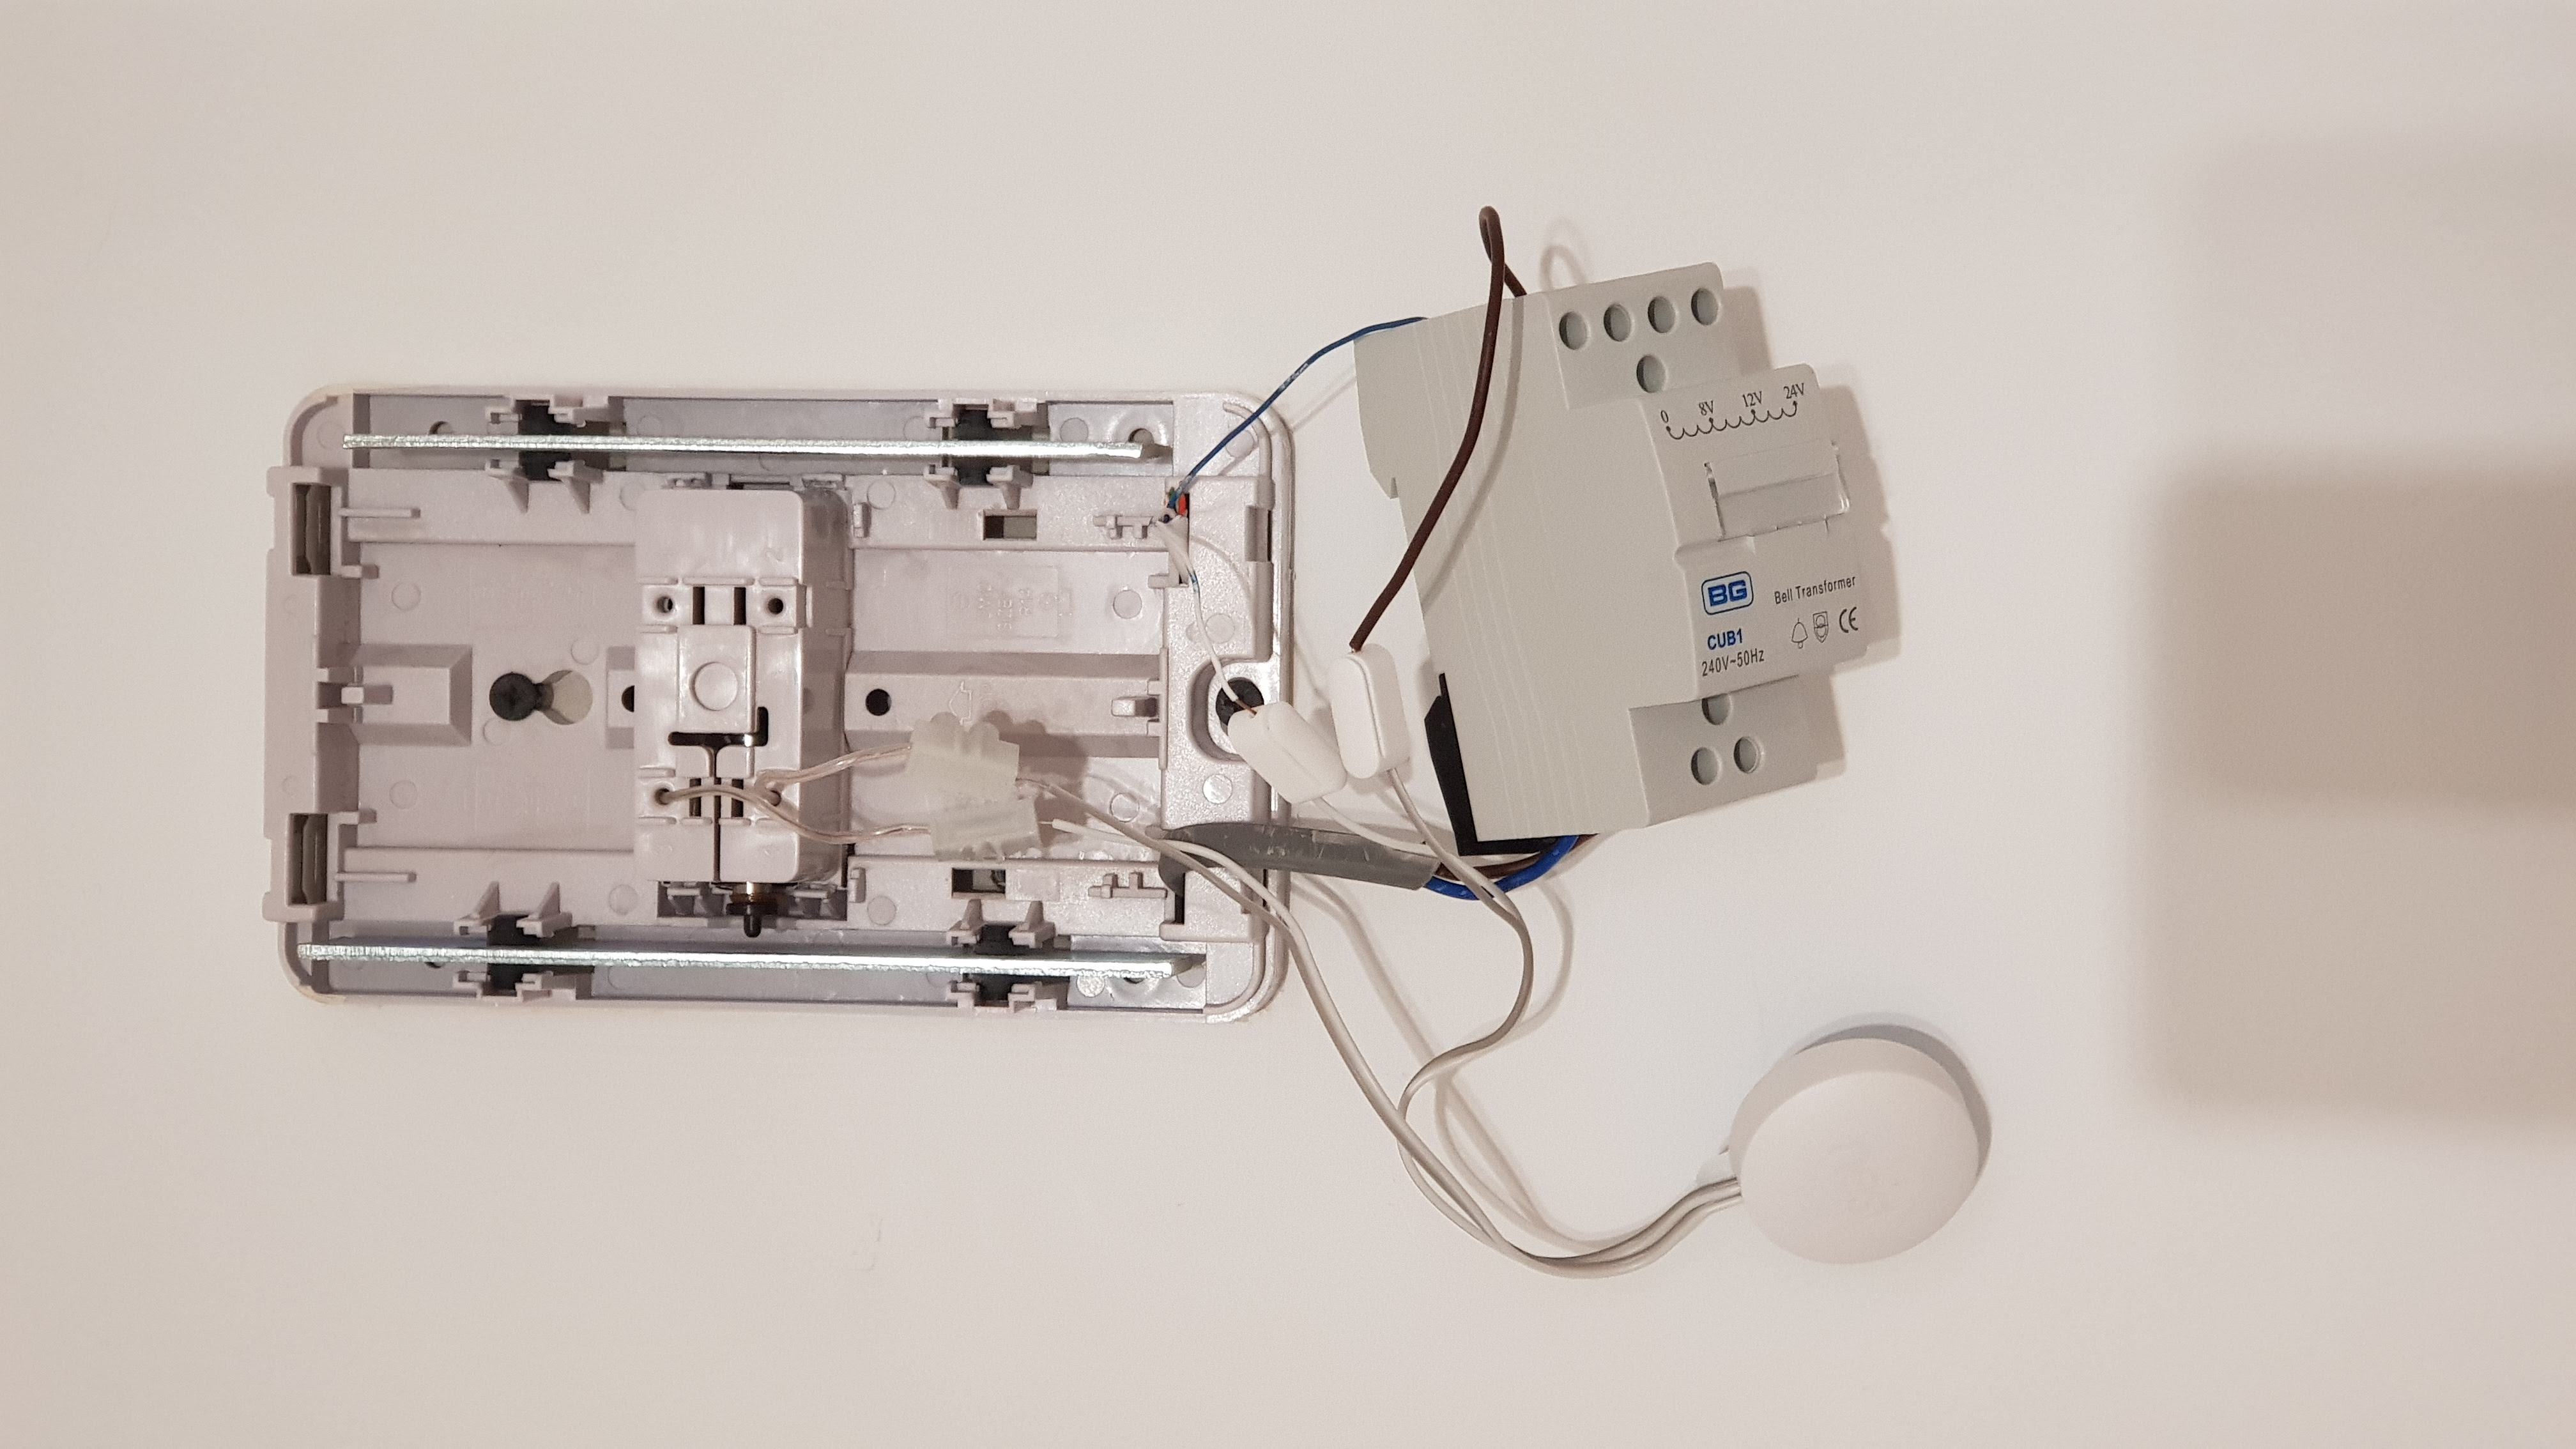
Here is my chime box opened up.

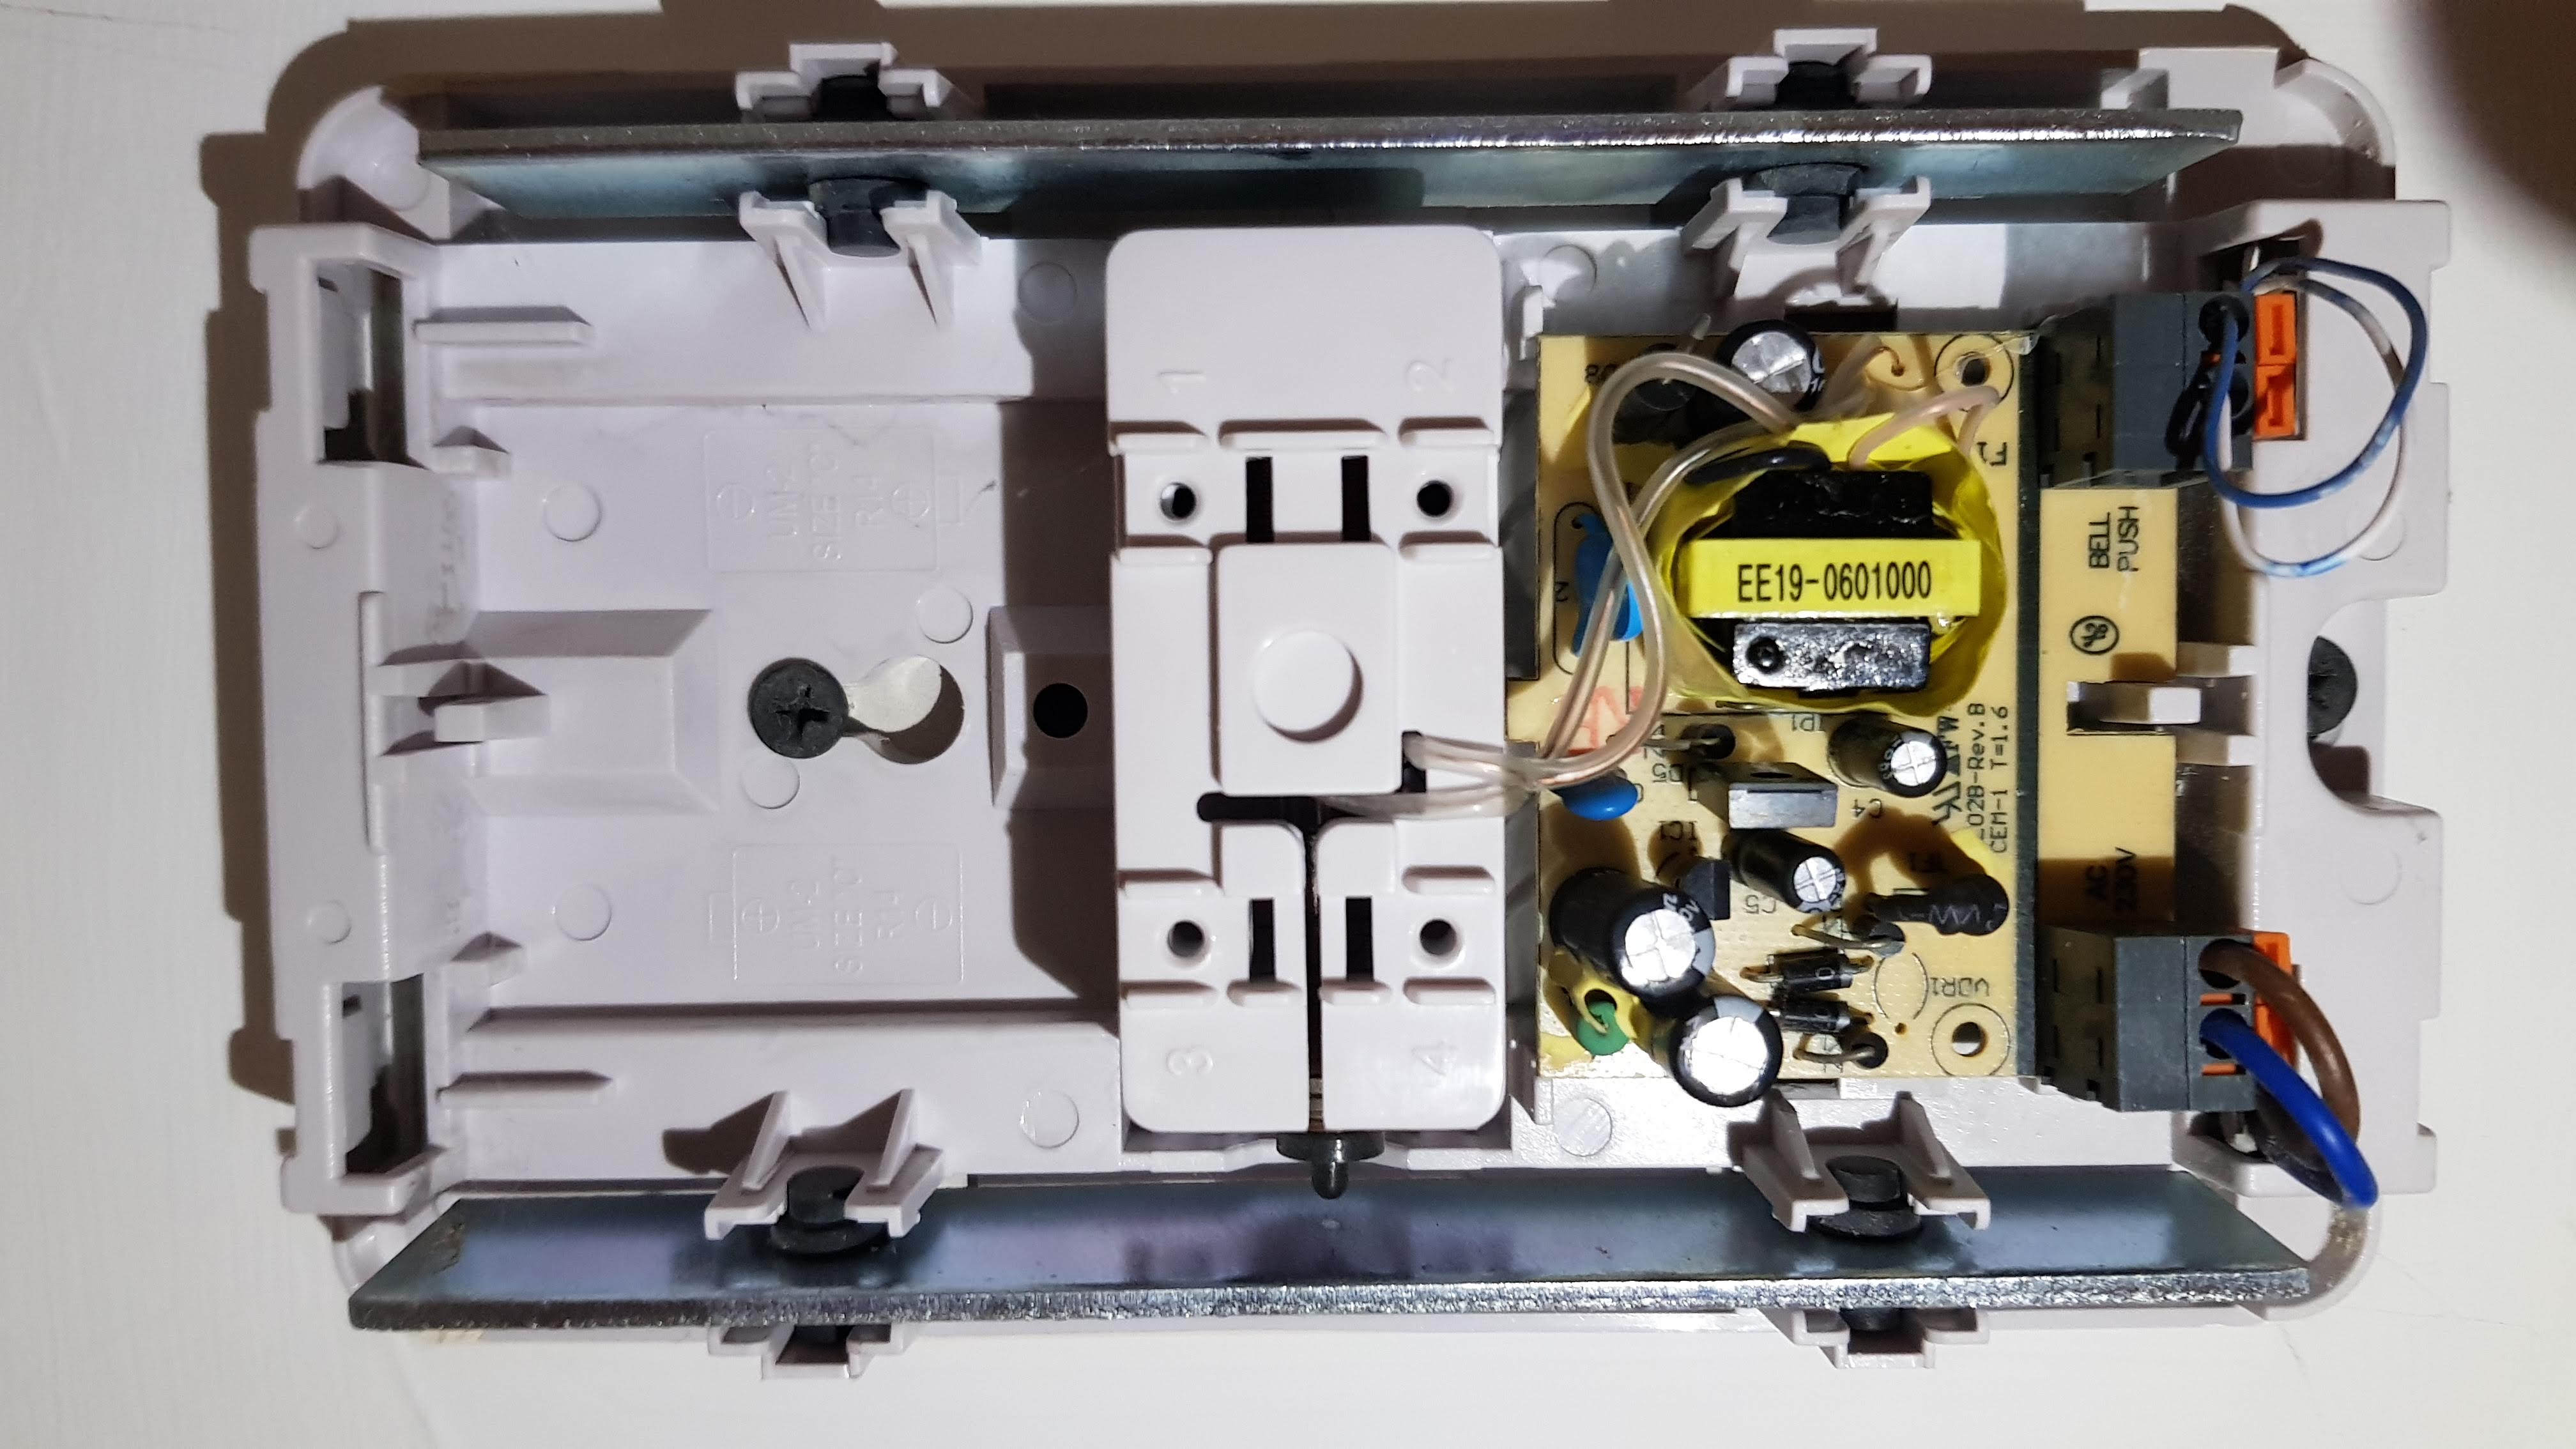
First obviously turn off electricity to your door chime at your consumer unit. I then unplugged the two blocks of wires with the left block blue and brown being the mains voltage supply, and the right block white and blue thinner wires that go to the door bell itself. I removed the chime box from the wall so it was easier to work with wiring it up.
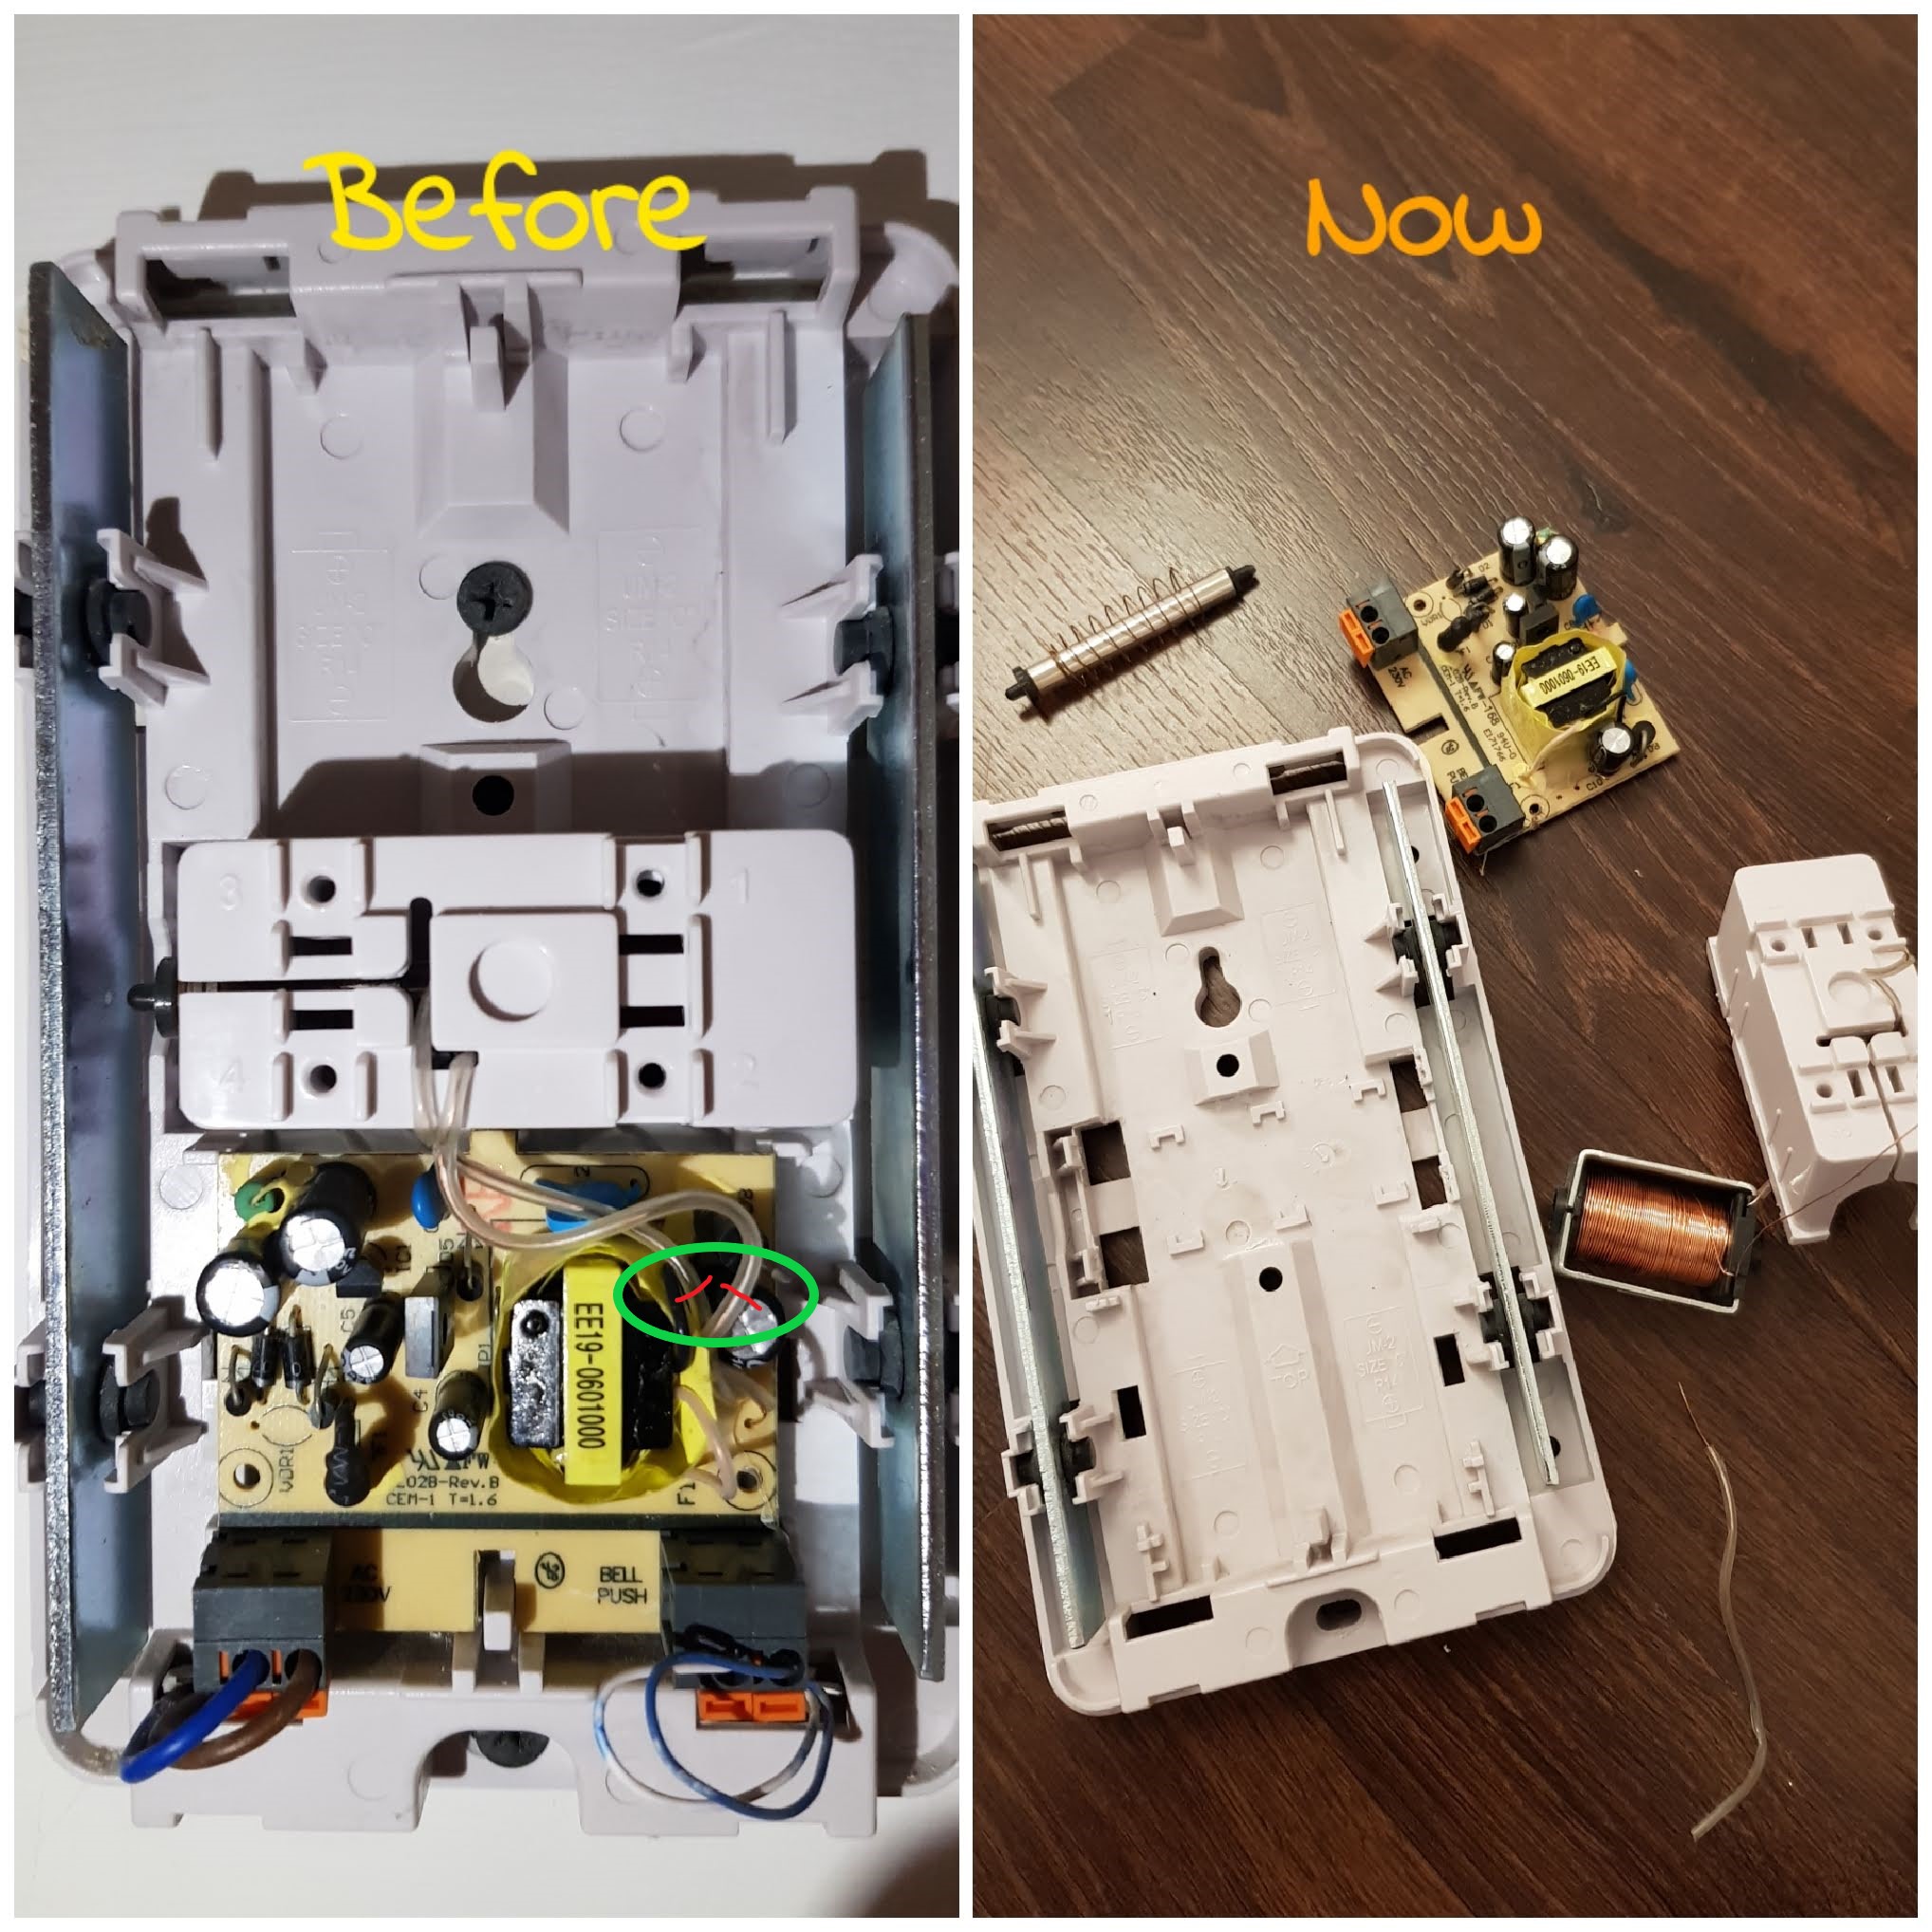
What is needed are the two coming out of the solenoid, i.e. the hammer to the chime, mines were covered in a plastic see through sheath. You need to keep these 2 wires connected to the solenoid so you have to cut them off as close to the circuit board as possible so that you retain maximum length on the wiring. I had troubles with the wiring in that one of them snapped off the solenoid, so I had to dismantle to see how I could salvage but luckily it was just coil wiring so there was plenty. The hardest part was actually trying to pry off the cover to the solenoid, it took almost an hour!
Where to cut the wires highlighted in red and me dismantling the solenoid
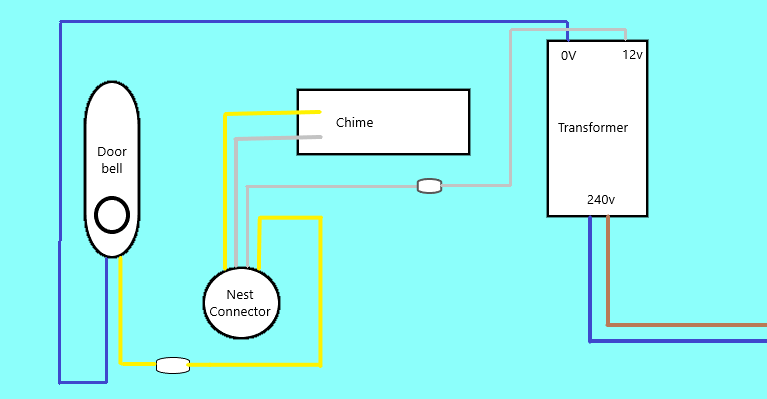
And here is the wiring diagram for my installation, note the yellow wire represents white.
I did a little test with the wiring before I actually installed the Nest doorbell to the outside. I installed the app and started doing the setup to make sure the wiring was ok.
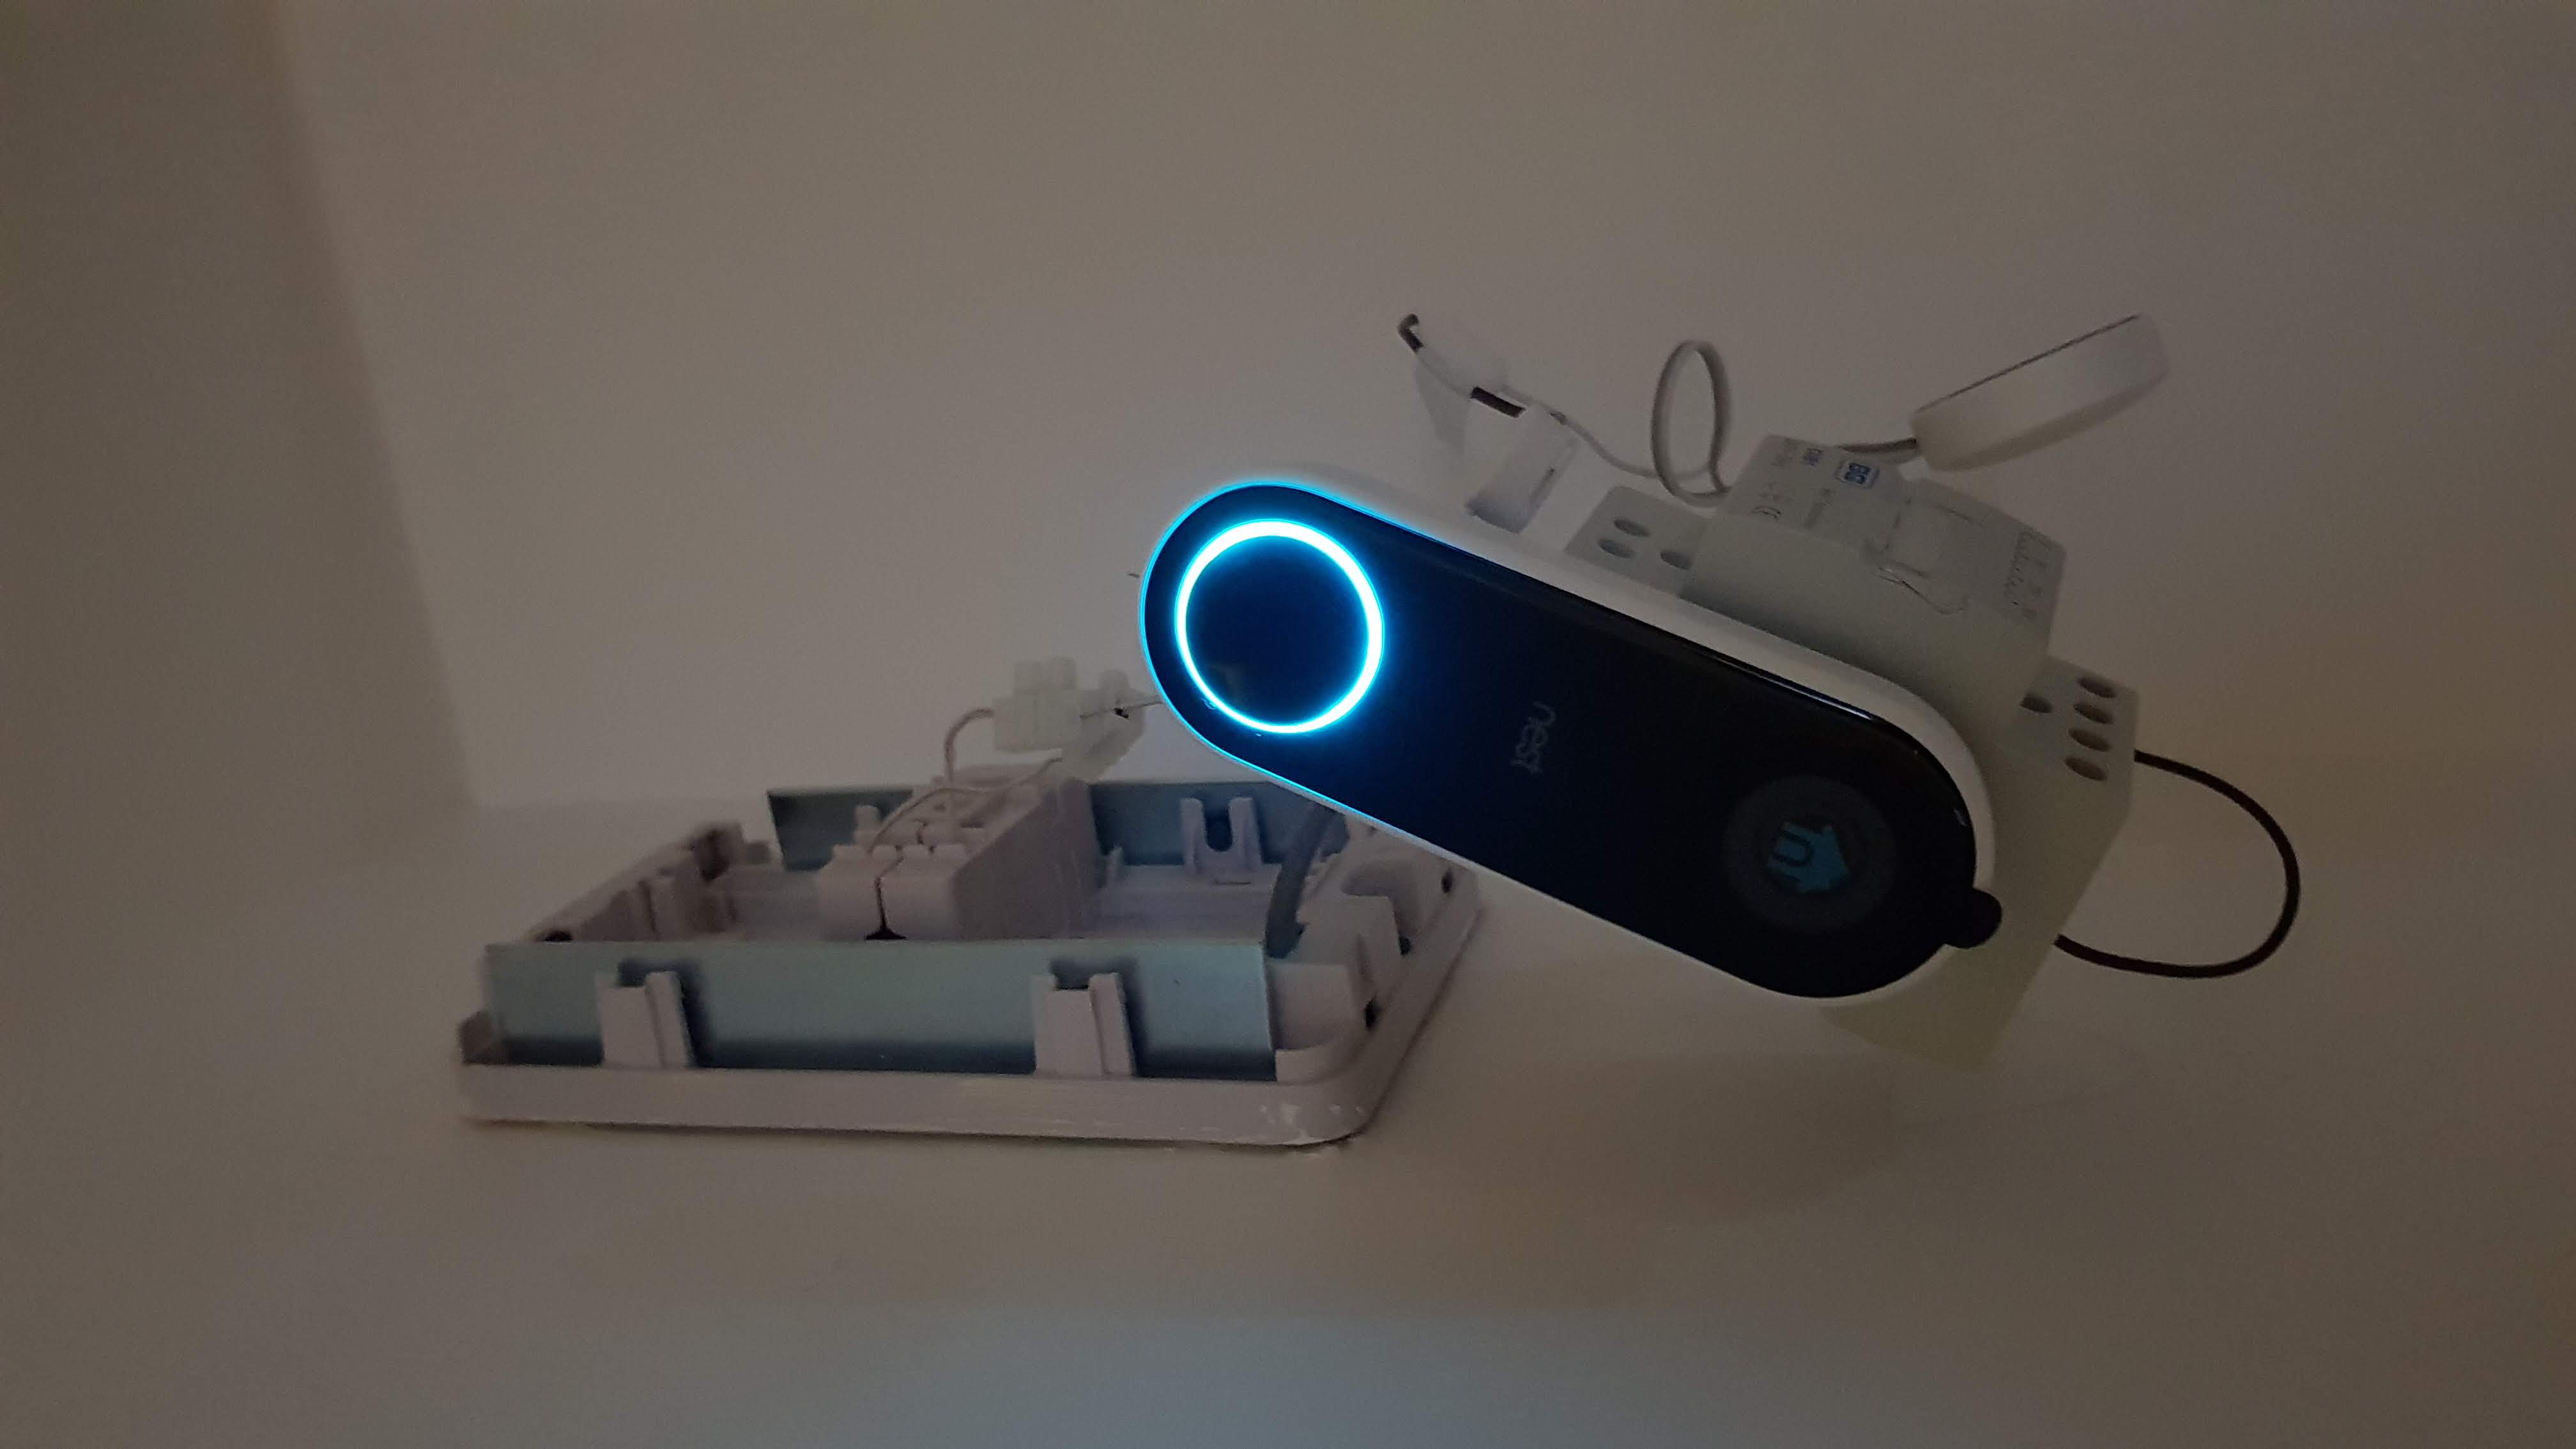
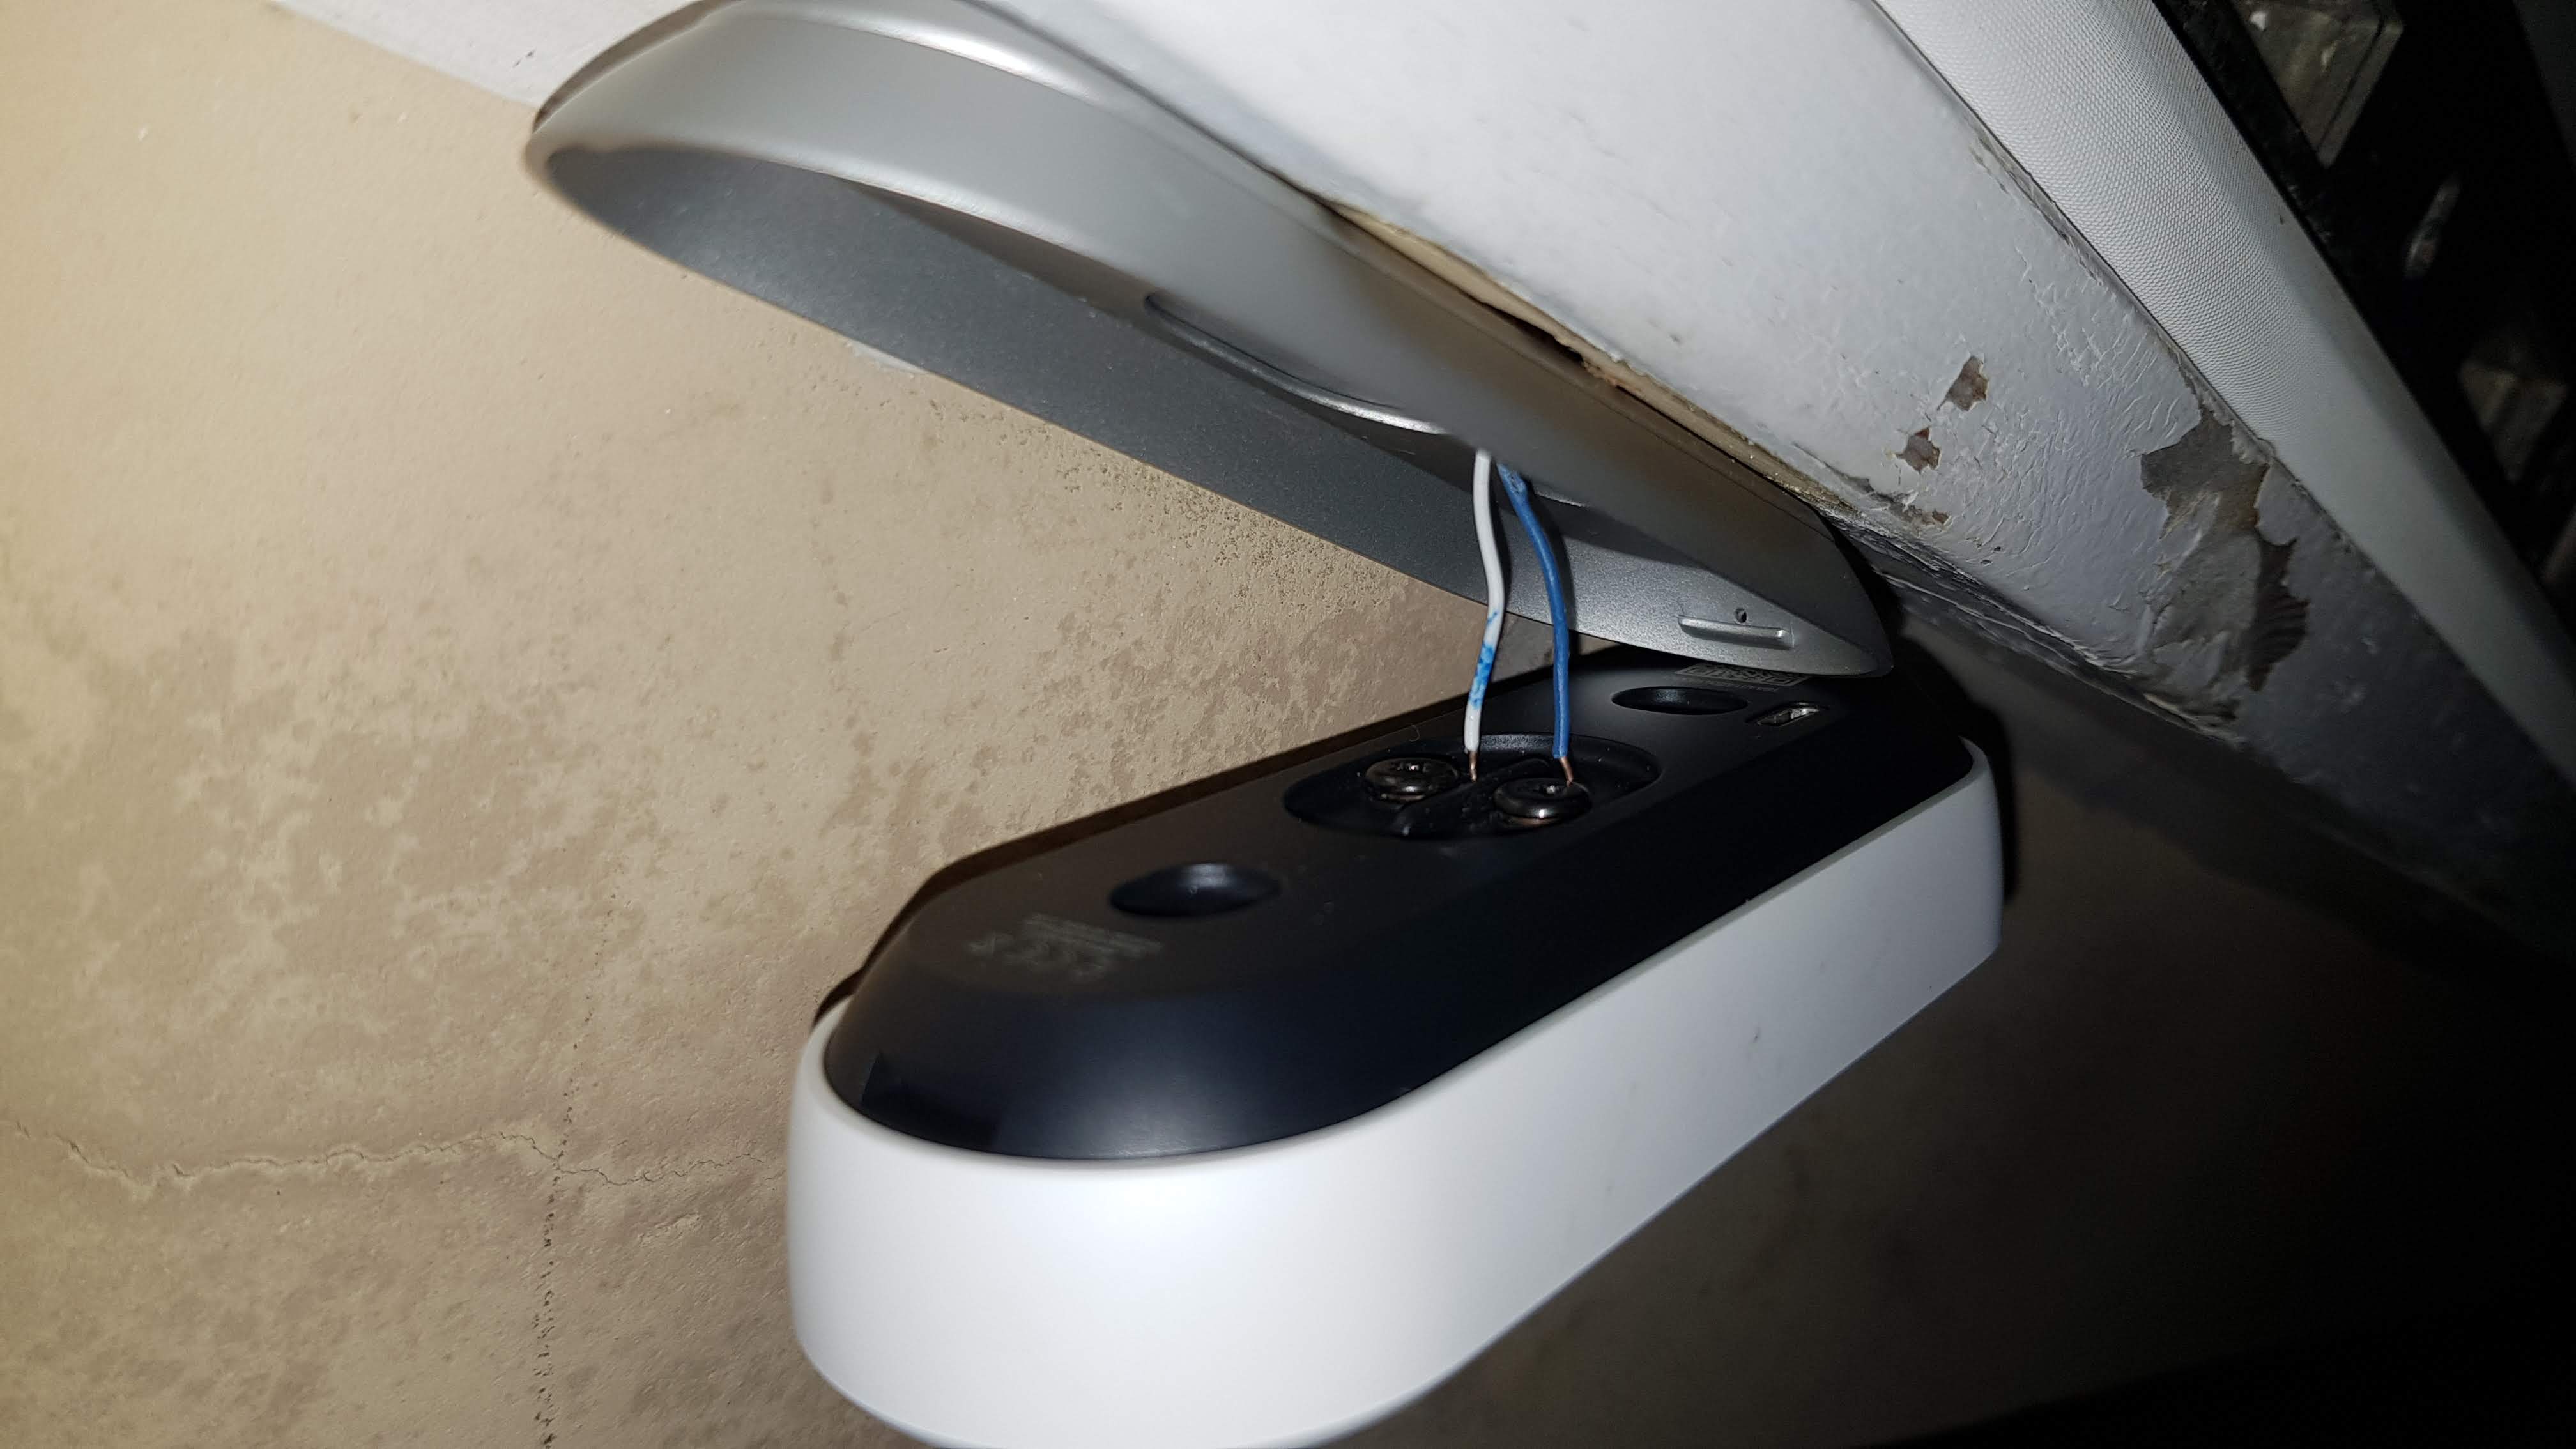
After I was happy with the wiring, I then wired the Nest doorbell to my existing bell wires outside. It doesn’t matter which way around the two wires go here according to Nest’s video instructions.
Wired up but as you can see, the new transformer is a monster so it will not fit into the chime box. I had to order an enclosure to make it tidy.
A week later with the new enclosure the installation is now looking decent.

Tided up wiring
Hope you find this useful. I have also uploaded a YouTube video in which I describe my installation too.

41 Comments
nathan
Hi Paul, super helpful post. I am installing a Nest Doorbell and I really appreciate your detailed guide. I was wondering what type of enclosure did you get to house that monster transformer?
Paul Lee
Hi Nathan, glad it helped you. The enclosure I had bought from Amazon.co.uk. The link is in the post but here it is again – https://www.amazon.co.uk/gp/product/B00MW89KQS/ref=ppx_yo_dt_b_asin_title_o05_s00?ie=UTF8&psc=1
Paul Lee
Hi Nathan, it’s basically a fuse box from Amazon. https://www.amazon.co.uk/gp/product/B00MW89KQS/ref=ppx_yo_dt_b_asin_title_o05_s00?ie=UTF8&psc=1
thekamhussain
Thanks Paul, fitted my best doorbell following these instructions.
Paul Lee
Thanks, glad it’s helped you out.
Anthony
Hi Paul,
Firstly thanks for the details post and youtube video, very informative. Wondering if you can help me, i don’t have existing chime but i do have my google home mini’s which does that job in my smart home system, so my issue is how to i get power from the consumer unit to the transformer? (Might be a silly question) i have the transformer coming from screwfix, my consumer unit is directly above my front door, any help would be hugely appreciated.
Paul Lee
Hi Anthony, thanks for reading my post. I’m not an electrician so I wouldn’t know how to create a connection from the CU to doorbell. However, if you don’t have an existing mains connection to the doorbell then I’d suggest using something like this – Power Supply for Video Doorbell,LANMU Power Adapter for Nest Hello Video Doorbell (5M) https://www.amazon.co.uk/dp/B07MJ953JD/ref=cm_sw_r_cp_apa_i_8JUwDbP52TTGM
It’s got an inbuilt transformer with the right voltage to power the Nest and you can just plug it into a uk wall socket. You wouldn’t need an external transformer.
0
0
Anthony
Thats how im currently running it, however these transformers are not designed for 24/7 usage and how hot it gets is a concern.
Thanks anyways, iv took from your post all the bits i needed and will find out with breaker i need to add👍🏻
Neal
Hi Anthony. Where have you seen that this transformer is not designed for continuous usage? According to the speciation on the BG page, its service period is described as Continuous Operation.
Could you please shed some light on this to an absolute n00b.
Paul Lee
Hi Neal, I think Anthony is referring to his direct 3 pin plug transformer from Amazon, not the BG one I have a link to in Screwfix.
Neal
Thanks Paul! This tutorial was unbelievably helpful, thank you!
Paul Lee
You are welcome.
Thomas Mclean
Hi, I just moved into my first house and this is one of my first projects. Just wondering, did you just place the transformer box over the old chime unit and drill new holes for the chime box? 🙂 Thanks
Paul Lee
Hi Thomas, no the original chime unit is still in the same place. I had to place the transformer beside it, so drilled new holes for the transformer housing. I passed the wires from the chime box to the transformer box. Hope this helps?
Thomas Mclean
Ah i see, so the mains and doorbell cables are still coming out of the same hole, but the wires have been pulled through a bit to accommodate the new location. Yes this is really helpful and im hoping to start doing the setup this weekend 🙂 and this post and youtube video are the most useful things ive found
Ted
Hi, Thanks for putting this on the internet. I had exactly the same setup as you and your instructions were very easy to follow! Only difference I had was I fitted a 2 gang back box behind the chime and housed the transformer in this so there wasn’t the extra box on the wall.
rajhossain
could you give a link for this 2 gang back box.
Paul Lee
Hi, the link to the 2-gang enclosure is on the post but here is the link again. https://www.amazon.co.uk/gp/product/B00MW89KQS/ref=ppx_yo_dt_b_asin_title_o05_s00?ie=UTF8&psc=1
ALB
@ Ted, can you post a link for this pls? Thx!
“Only difference I had was I fitted a 2 gang back box behind the chime and housed the transformer in this so there wasn’t the extra box on the wall.”
KAREN
hi, how is the chime connector connected to the transformer please? what is the black cable? ty
KEREN JOSEPH
Hi, you never replied to my question or half of the questions put to you?
Paul Lee
Hi, sorry. Thanks for visiting again. I’ve not had much time lately but I’ve caught up with all the replies I hope. I’ve just used a 1mm cable. It’s looks black in the photos but it’s actually brown, some spare wire taken from twin-core. Does this answer your question?
Miguel
Hi Paul, where did you get the 1mm cable? Will something like this do? https://www.screwfix.com/p/nexans-round-flex-3185y-5-core-1mm-5m-white/1770t ?
MR MATTHEW KING
Hi Paul, quick question if you don’t mind? If I don’t want to use my Deta chime as a chime for the Nest, I’m guessing I don’t need to worry about messing with the chime at all and just attach the Nest to the wiring from the doorbell? (I will be using Google minis as door chimes, dotted around the house)
Hugo Costa
Hi Paul, Does your transformer make a buzzing/humming sound?, I tested the transformer, with everything else unplugged apart from the mains (240v live and neutral) and the transformer still made a sound assume it make this sound under normal operation?
Paul Lee
Hi Hugo. It does emit a faint humming sound but it is so faint u have you ear right next to it to hear it. This is normal.
0
0
Adam Cooper
Excellent guide, made it really easy to install. Thanks for taking the time to write this up!
Paul Lee
You are welcome! Glad you’ve got it up and running.
Roger Pangbourne
Just wanted to say thank you very much for your Nest Hello video and blog; particularly the wiring circuit. The most useful thing I found on the web. All now up and operating smoothly – thank you.
Steve Corden
Awesome post, fitted the doorbell today and this helped loads! Thanks very much.
Andrew
Hi Paul,
Thank you so very much for this incredibly helpful instructive review. It has been very hard to find any instruction on using a Deta doorbell and your step by step method with the YouTube video has been a fantastic find.
Thanks again for taking the time to write and publish this.
Andrew von Moeller
lots of people saying wire up to 1st and 4th pin (0 -24v) and others saying 1st and 3rd (0-12v)? I currently have wired up 1st and 4th (without chime connector) and works fine
George
Hi Paul. Thanks for your guide. Followed it to the letter. However, I am using a C3501 and initially after turning the power back on the chime works but as soon as the nest connects to the WiFi I can see the chime hammer move but fails to chime. I am assuming the best hello is taking to much voltage and is now preventing my mechanical chime from working. Do you have any thoughts?
Paul Lee
Hi George, you could try up-ing the voltage output from the transformer. The Nest can operate up to 24v.
cs_
Paul, thanks for this. I am about to do this myself. Only question is – which pins did you use from the CUB01 transformer? In your picture you show the 12v and 0v .. but the bell needs >12v doesn’t it? I saw a similar set up taking outputs from 12 & 24v and on the screwfix website, under comments someone had said to use pins 1 and 4.. which would make it 24v — so 3 different setups for the CUB01. appreciate your time.
Paul Lee
Hi cs_, my chime needs 8v, according to info out on the internet that is pretty standard in the UK, hence all this trouble re a transformer. The Nest Hello can operate between 12-24v. I’ve wired my transformer to output 12v. Hope that helps?
Seb
Hi Paul,
Thanks for this detailed guide, the best one out there! Question, chime’s coil … did you take it into pieces for a reason? I am looking at mine and have a feeling that one of the wires broke inside the sleeve, can’t get the damn thing to ding dong. Or there is another option, did you test it purely based on voltage going into it all or does Nest need configuring / connecting before it can actually force the chime to make any sound? My suspicion is that something isn’t letting the current go through but it worked before I removed the circuit board so a bit stuck. Thanks
Paul Lee
Thanks for visiting. I had one of the wires snapped from the coil so that’s why I had to remove and unwind some more. I would double check all the connections and the hammer/solenoid itself is seated properly as well.
Hope you figure out what is wrong.
Luke
Hi Paul. Thank you for this guide. This is the exact installation I am about to attempt, so your instructions will be super helpful.
At the moment, the website isn’t displaying the photos. I was wondering if you might get a chance to fix it or provide a link to them somewhere.
Thank you.
Paul Lee
Hi Luke, not sure what happened. I’ve updated the post now and the images are now back. Hope you get your project working smoothly!
luke sheridan rains
Fantastic, thanks Paul. I can see them all now.